
Restoring SSH access using the web console in VMware ESXi

Disclaimer

Lets start this post pointing out that this is an incredibly hacky (read: bad) way to recover the (mostly default?) sshd_config file on an ESXi installation. It turns out when I first made the change, I did not test that it actually persisted after reboot and didn't find out until after I installed an update, 262 days after the last configuration change. Oops. I definitely don't recommend doing this unless you have no other choice and don't have support from VMware.

As with everything you read online, I provide no support, warranty, or any other claims if you follow these steps, and am not responsible if you mess up your installation!

Background

With all that out of the way, let me set the stage. My ESXi instance is hosted in a remote co-located center, without a remote IP KVM (since I am too cheap to pay for one). Not exposed to the internet, I need to VPN in to get access to the web console (HTTPS) or SSH. This has served me well for the last half year, and even with the VPN requirement, I also edited the SSHD configuration file to require private key access and disable the root user from logging in via SSH (security in depth).

The update

The server had an uptime of 262 days since the last reboot and I decided to apply the latest ESXi update. After the update, I could log in via the web console, but SSH access was denied. Even though it seems conveniently timed, the update did not cause any of these problems. This would have occurred if the server rebooted for any other reason.

I originally followed this VMware KB article on how to secure SSH. I diligently copied my SSH keys in to /etc/ssh/keys-<username>/authorized_keys as described. What they fail to mention is that the keys do not persist after a reboot. The changes to sshd_config do persist, however, which is why I was left with keys that could log in to root, but PermitRootLogin no was still set. I had lost SSH access to my instance.

Confirming SSH Keys

During the troubleshooting process, I came across some neat ways to verify and set the SSH keys for the root account. I didn't see much in the way on how to do it. The endpoint to use is hosted at the same site and port of your web console, so if you access your console via https://server/ui you can access files via the /host path: https://server/host.

From what I have been able to gather, accessing this endpoint to upload files requires both Basic authorization as well as sending a vmware_client=VMware cookie when sending the PUT request.

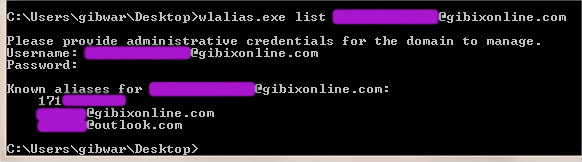
Checking the current root SSH keys

I used PowerShell Core to run the following commands, but this would work in regular Windows PowerShell as well as can be adjusted for any other client of choice (curl, etc).

% $creds = Get-Credential

PowerShell credential request.
Enter your credentials.
User: esxi-admin
Password: ****

% $r = Invoke-WebRequest `
>> -Credential $creds -Authentication Basic `
>> -SkipCertificateCheck `
>> -Uri "https://server/host/ssh_root_authorized_keys"

% $r.Content
ssh-rsa AAAA...

Updating the root SSH keys

Using the output of $r.Content above, I took the current content and added my new SSH key (because at the time I was thinking it was a key issue, not a configuration issue) and uploaded the keys to the server, this was also done in PowerShell.

% $keys = "$($r.Content)`n$(Get-Content ~/.ssh/esxi.pub)`n"
% $keys
ssh-rsa AAAA...
ecdsa-sha2-nistp256 AAAA...

% Invoke-WebRequest -Credential $creds -Authentication Basic `
>> -Uri "https://server/host/ssh_root_authorized_keys" -SkipCertificateCheck
>> -Method PUT -Headers @{Cookie="vmware_client=VMware"} -Body $keys

StatusCode        : 200
StatusDescription : OK
...

Repeating the code above for checking the keys confirmed it added the new key as expected.

Attempting to create a custom VIB

After getting a new SSH key on the server and confirming that it doesn't work for my admin user or root user, I finally had the wherewithal to check the logs on the web console, and finding that root login wasn't even being attempted because root access was deined. That means my sshd_config file was still intact after the update, but the keys for my admin user were missing and root was blocked from logging in. How can I go about getting access? It turns out a custom VIB was the solution! Or so I thought. While I ran in to several posts on the subject, nothing really worked to the extent I was hoping for. NOTE: this is where having physical access would have allowed me to fix the file and be on my merry way. If you have physical access, USE IT!

First issue is that without VMware's blessing, you cannot create a "community" bundle file that has permissions to the core system (/etc, /usr stuff) but could write to /opt or create firewall rules. Unfortunately, I needed to fix the sshd_config file, so a community version was not going to work, and let me tell you, I tried. I went through the process of grabbing VMware's VIB builder program, getting SuSE Enterprise Linux 11 SP2 to run (see firewall link above for directions, don't go higher, it won't install the tool!), building and deploying my file. I even came across a way to use "partner" files without VMware's signature, however that only works in a setup with vSphere. I found I could even force the install of my community VIB ... if I had SSH access.

Nothing I found would work in my scenario, though curiously every search I had that involved "ssh" and "vib" kept returning results for some VMware community Department of Defense thing, which I kept ignoring, because why would I need some DOD thing? Well, as I was about to order an IP KVM, I decided to check out the link.

Finding the "right" VIB

Having had a crash course in how VIBs work and their terminology I was able to read through and understand the instructions on what the VIB actually did, which I figured would be quite complex. All it does is edit 4 files in your system:

  • /etc/issue: adds a super scary login banner warning about accessing United States Government infrastructure

  • /etc/pam.d/passwd: updates password complexity requirements

  • /etc/ssh/sshd_config: "adds necessary daemon settings"

  • /etc/vmware/welcome: adds the same super scary warning to ESXi's direct console screen (physical access).

Reading deeper, the DoD VIB also comes in two flavors: enable root SSH access and deny root SSH access. Bingo! The changes in the VIB were safe enough that it wouldn't impact the system and it will set PermitRootLogin to yes! I quickly downloaded the zip file and promptly used the dod-stigvib-67-re-1.0.0.1.14639231.vib file. Et voilà, I had SSH access to my system again through the root account! Not wanting root access, I promptly disabled it again after setting my admin user's keys again. Or so I was hoping. It turns out that when you have files managed by a VIB, you cannot edit the files, even as the root user. I uninstalled the DoD VIB and crossed my fingers.

I still had access!

Using a shell script to set SSH keys on reboot

With access restored for the root user and the DoD customizations removed I had full access back to the configuration files I needed. I still want to disable root access to SSH and somehow persist my esxi-admin's keys after a reboot. How to pull this off?

It turns out that I had actually found the answer in my previous VIB author searches. While the directions are listed for ESXi 4.x/5.x, they also work fine on 6.x as well. Custom files, such as /etc/ssh/keys-<username> are not backed up by the system, and you cannot force it by creating .#files or other means, it turns out you can edit /etc/rc.local/local.sh and have it backed up and persisted across reboots! Once I found these nuggets I found people copying SSH keys to the persisted volume mounts and copying it to a local ~/.ssh file for the user. Since I have a single user and my root account is effectively disabled, I opted for a simpler approach of copying the SSH keys from the root user to my user on boot.

mkdir /etc/ssh/keys-esxi-admin
cp /etc/ssh/keys-root/authorized_keys /etc/ssh/keys-esxi-admin
chown esxi-admin:esxi-admin /etc/ssh/keys-esxi-admin/authorized_keys

So there you have it, a way to recover SSH access due to a modified sshd_config file without needing physical access (but needing web console access). If you have physical access, please use it instead of this long thread of bad ideas. As stated at the beginning, I am not responsible if you use this and completely break your installation. No warranty, support, etc is implied.

Mapping GoControl HUSBZB-1 USB Hub ZigBee/Z-Wave devices inside a systemd nspawn container

As I'm moving away from Docker the last thing I needed to move was my Home Assistant instance in to a systemd nspawn container instance. For the most part this has been pretty easy, however I needed a slightly more advanced setup than my other containers. I need to be able to map my GoControl HUSBZB-1 USB Hub's ZigBee and Z-Wave devices in to the container.

Identifying the device

The first thing I needed to do was define the name I wanted to use in the container. My current Docker setup uses the /dev/ttyUSB0 and /dev/ttyUSB1 devices directly. I know you can give them better names via udev so let's do that!

First I needed to identify the device and grab some useful static identifiers.

user@host:~$ udevadm info -a /dev/ttyUSB0
  looking at device '/devices/pci0000:00/0000:00:14.0/usb2/2-4/2-4:1.0/ttyUSB0/tty/ttyUSB0':
    SUBSYSTEM=="tty"
    DRIVER==""

  looking at parent device '/devices/pci0000:00/0000:00:14.0/usb2/2-4/2-4:1.0/ttyUSB0':
    KERNELS=="ttyUSB0"
    SUBSYSTEMS=="usb-serial"
    DRIVERS=="cp210x"
    ATTRS{port_number}=="0"

  looking at parent device '/devices/pci0000:00/0000:00:14.0/usb2/2-4/2-4:1.0':
    KERNELS=="2-4:1.0"
    SUBSYSTEMS=="usb"
    DRIVERS=="cp210x"
...
    ATTRS{interface}=="HubZ Z-Wave Com Port"
...
user@host:~$ udevadm info -a /dev/ttyUSB1
  looking at device '/devices/pci0000:00/0000:00:14.0/usb2/2-4/2-4:1.1/ttyUSB1/tty/ttyUSB1':
    KERNEL=="ttyUSB1"
    SUBSYSTEM=="tty"
    DRIVER==""

  looking at parent device '/devices/pci0000:00/0000:00:14.0/usb2/2-4/2-4:1.1/ttyUSB1':
    KERNELS=="ttyUSB1"
    SUBSYSTEMS=="usb-serial"
    DRIVERS=="cp210x"
    ATTRS{port_number}=="0"

  looking at parent device '/devices/pci0000:00/0000:00:14.0/usb2/2-4/2-4:1.1':
    KERNELS=="2-4:1.1"
    SUBSYSTEMS=="usb"
    DRIVERS=="cp210x"
...
    ATTRS{interface}=="HubZ ZigBee Com Port"
...
user@host:~$

Based on some very helpful posts, I was able to figure out the pieces I needed to define my udev rules.

Creating a udev.rules file in /etc/udev/rules.d/99-gocontrol.rules I added the following.

SUBSYSTEM=="tty", ATTRS{interface}=="HubZ Z-Wave Com Port", SYMLINK+="zwave", MODE="660", GROUP="1500905492"
SUBSYSTEM=="tty", ATTRS{interface}=="HubZ ZigBee Com Port", SYMLINK+="zigbee", MODE="660", GROUP="1500905492"

I then reloaded the rules and triggered udev to rescan devices.

user@host:~$ sudo udevadm control --reload-rules
user@host:~$ sudo udevadm trigger
user@host:~$ ls -l /dev/ttyUSB*
crw-rw---- 1 root 1500905492 188, 0 Sep 22 23:23 /dev/ttyUSB0
crw-rw---- 1 root 1500905492 188, 1 Sep 22 23:23 /dev/ttyUSB1
user@host:~$ ls -l /dev/z*
crw-rw-rw- 1 root root 1, 5 Sep 22 23:18 /dev/zero
lrwxrwxrwx 1 root root    7 Sep 22 23:18 /dev/zigbee -> ttyUSB1
lrwxrwxrwx 1 root root    7 Sep 22 23:18 /dev/zwave -> ttyUSB0
user@host:~$

Yay! The devices have an updated group ID and the symlinks match the device names in a more reliable way. Note the symlinks are still owned by root since symlinks themselves cannot have permissions assigned, they just point to another file in the file system, they can, however have an owner and group assigned, but in this case it's inconsequential. Now that the devices have been created, I need to map them inside the container.

Binding the devices to the container

To bind the devices in the container, I need to configure both the machine's .nspawn file in /etc/systemd/nspawn as well as the service startup file .service. I'm using systemd's nspawn's template file, so I take advantage of the override logic systemd provides rather than create a standalone template file. This lets any changes provided by the system to provide the base while I augment it with the couple settings I need.

The first thing I need to do is map the device in /etc/systemd/nspawn/home-assistant.nspawn. (The name of the file is the same name of the container, you'll see it again in the service file as well.)

# /etc/systemd/nspawn/home-assistant.nspawn

[Files]
Bind=/dev/zigbee:/dev/zigbee
Bind=/dev/zwave:/dev/zwave

The Bind= directive in the .nspawn file will the host's file on the left of the : to the container's path on the right. In this case, it's a direct mapping of /dev/zigbee from the host to the container.

The default container template systemd uses to launch a container is correctly restrictive when it comes to device access, so we need to override the configuration to allow our devices through. If the container is running, you can run sudo systemctl edit systemd-nspawn@home-assistant.service and systemd will take care of creating the correct path and override file for you. However, if the container is not running, the service will not exist and the command will fail.

// if the machine is running, you can edit the override with this
user@host:~$ sudo systemctl edit systemd-nspawn@home-assistant.service

// or, if the machine is not running, you need to create the directory
// and override file yourself.
user@host:~$ sudo install -d -m 0755 -o root -g root /etc/systemd/system/systemd-nspawn@home-assistant.service.d
user@host:~$ cd /etc/systemd/system/systemd-nspawn@home-assistant.service.d
user@host:/etc/systemd/system/systemd-nspawn@home-assistant.service.d$ sudoedit override.conf

We need to add two DeviceAllow= directives to let the devices map inside the container.

# /etc/systemd/system/systemd-nspawn@home-assistant.servce.d/override.conf

[Service]
DeviceAllow=/dev/zigbee rwm
DeviceAllow=/dev/zwave rwm

The DeviceAllow= directive grants access to the device based on the second string provided, in our case rwm. The rwm allows (r)ead access, (w)rite access, and the ability to (m)ake the node.

Verifying the devices show up in the container

All that is left is to restart the container, get a shell, and verify the device listing.

user@host:~$ machinectl poweroff home-assistant
user@host:~$ machinectl start home-assistant
user@host:~$ machinectl shell home-assistant
root@home-assistant:~$ ls -l /dev/ttyUSB*
ls: cannot access '/dev/ttyUSB*': No such file or directory
root@home-assistant:~$ ls -l /dev/z*
crw-rw-rw- 1 root   root      1, 5 Sep 22 23:43 /dev/zero
crw-rw---- 1 nobody dialout 188, 1 Sep 22 23:23 /dev/zigbee
crw-rw---- 1 nobody dialout 188, 0 Sep 22 23:23 /dev/zwave

Boom! That's it, we're done! Eagle-eyed observers will notice that the owner is nobody and not root. This is the flip side of the private-user-coin. On the host, root owns the device and 1500905492 is the group. Inside the container, the opposite is true, the owner is the special nobody wildcard since it can'tresolve the real root owner (because the root account is actually 1500905472 inside the container) but the group is properly matched to dialout since the gid in the container is 20, and hey would you look at that, 1500905492 is 20 higher than 1500905472!

If you look a little closer, the original /dev/ttyUSB0 and /dev/ttyUSB1 devices are not in the container, and that's OK! Instead of simply binding the symlink (as what usually happens in a bind) the nspawn process created new device nodes for us, with the correct 188, 0 and 188, 1 device identifiers.

Reestablishing an IPsec tunnel between OPNsense and UniFi Security Gateway after your IP address changes

On Friday, September 4, 2020, Comcast Xfinity experienced an outage here at home from about 1 PM to about 9 PM. Whatever happened was so severe that even my mobile service lost all data networking as well, meaning, I was only able to call and text using regular SMS. My current, unsubstantiated theory is that somebody, somewhere managed to cut a fiber line that serviced both and managed to knock out everything. The outage appeared to be localized around where I live as others in the city did not have an interruption but lasted long enough that my normally stable public IP address changed when service was restored. This post covers reestablishing my IPsec tunnel between my colocated server and my home network and really exists, so I have an easy to follow guide™ in connecting the tunnel after my public IP address changed.

In a yet-to-be-written post detailing my current local and hosted setup, this post covers the steps I took to get the IPsec tunnel back up and working. The examples below are removing an old IP address of 1.1.1.1 and replacing it with the new IP address of 1.1.1.2.

Granting access to VMWare ESXi

The ESXi server is set up to allow SSH access with public key authentication only, so it does not have an IP allow list configured. This is quite fortuitous as it gives me a steppingstone to get back in without opening a support ticket with my hosting service. The main step here was to SSH in to the ESXi host, remove the old IP address and add the new IP address to grant access to the web services. The ESXi host is running 6.7, so the steps may be different on ESXi 5 or 7.

[home]% ssh esxi.host
# authenticate via public key

[esxi]% esxcli network firewall ruleset allowedip list --ruleset-id=vSphereClient
Ruleset        Allowed IP Addresses
-------------  --------------------
vSphereClient  1.1.1.1

[esxi]% esxcli network firewall ruleset allowedip remove --ruleset-id=vSphereClient --ip-address=1.1.1.1
[esxi]% esxcli network firewall ruleset allowedip add --ruleset-id=vSphereClient --ip-address=1.1.1.2

# no output is produced with the add/remove commands, so verify the
# change took place
[esxi]% esxcli network firewall ruleset allowedip list --ruleset-id=vSphereClient
Ruleset        Allowed IP Addresses
-------------  --------------------
vSphereClient  1.1.1.2

With that, you can access the ESXi web interface.

Granting access to the OPNsense router

Another appliance in my setup needing an update to the IP allow list is my OPNsense router, so I can access the configuration interface and update the IPsec tunnel settings. This requires access to the ESXi web interface to get console access to OPNsense. Once in the shell, adding the public IP address to the allowed_config PF table is quite straightforward.

[opnsense]% pfctl -t allowed_config -T add 1.1.1.2

Do not bother removing the old IP address as any change in OPNsense will replace any changes here, so immediately go and update the rule alias and swap out the IP addresses.

Firewall > Aliases > Edit allowed_config entry

Edit the alias and remove the old 1.1.1.1 address and add the 1.1.1.2 address and apply the changes. Clear the console and log out. You are done with ESXi at this point.

Updating configured WAN IP on the UniFi Security Gateway

Due to an incomplete configuration (more on that on the future IPsec setup post) I decided updating the UniFi Security Gateway (USG) would be next on the list since the USG is unable to successfully connect the IPsec tunnel when initiated from the USG to the OPNsense router.

I loaded up the local UniFi Network Controller interface, jumped into the settings section, and updated the "Local WAN IP" with the new public IP address.

Settings > VPN > VPN Connections > Remote Network

Screenshot of the UniFi Network Controller remote network VPN connection settings with the cursor focused in the Local WAN IP input field with an updated IP address of 1.1.1.2.

Replace the old WAN IP Address field with the new one and click "Done" at the bottom of the page. While you are working on the other steps, the USG will provision the changes and be ready for incoming IPsec tunnels.

Changing the Remote Gateway address in OPNsense IPsec Tunnel Settings

The last piece of the IPsec tunnel puzzle is to update the Remote Gateway IP address configured in the OPNsense IPsec tunnel settings. You will need to edit the Phase 1 entry for the IPsec configuration you are updating.

VPN > IPsec > Tunnel Settings > Edit the Phase 1 rule entry

Screenshot of the OPNsense VPN IPsec Phase 1 settings configuration page with the cursor focused in the "Remote Gateway" input field with an updated IP address of 1.1.1.2.

Update the "Remote Gateway" field with your new public IP address, click "Save" at the bottom of the page, and then click "Apply changes" in the upper right of the next page in the notification banner.

Probably Unnecessary Steps

At this point, you are pretty much good to go. With my current configuration, the USG cannot initiate the connection to OPNsense (for some reason, it attempts to use a certificate to authenticate when it should be using a Pre-Shared Key) so I initiate the connection from OPNsense by navigating to VPN > IPsec > Status Overview and clicking the play icon on the IPsec tunnel to restart the connection. Now, since everything is reconfigured correctly it should work.

In my case, the tunnel was set up, but no traffic would route through the tunnel. I could see IPsec packets passing by in the live firewall logs, but no responses were coming back. I double checked other areas to ensure the public IP address did not appear in other potential configuration areas: the configured gateway, and static routes. Everything seemed fine. Since the USG has issues connecting, I tried forcing a provision of the configuration profile, and when that did not fix the issue, I restarted the USG. Much to my surprise, restarting the USG did not fix the issue either.

I double checked the strongSwan configuration on both sides with the --list-conns and --list-sas and confirmed they had identical settings (this was a sticking point that will most likely be detailed in the future post) and monitored the connection setup with --log, everything appeared to be configured correctly and the two endpoints were talking and able to ping the endpoint address on the other side of the tunnel. Running out of options and about to pull my hair out in frustration, I tried the final thing I could think of: I restarted OPNsense.

It worked and my IPsec tunnel is back up and operational! My only guess is that there was some residual routing or other configuration left over in OPNsense that even restarting the strongSwan service did not fix. Maybe there was a route left over that could not update? I have no idea. Either way, I hope you will find this guide helpful, and that my future self will check back here the next time my house's public IP address changes.

Simple PurpleAir integration for Home Assistant

With much of the western United States on fire, and blankets of smoke spanning much of the distance to the the midwest, I wanted to be able to integrate data from the PurpleAir free air quality platform. Inspired by @colohan's PurpleAir Air Quality Sensor using the REST platform I dug a little deeper and definitely went overboard with my solution.

Screenshot of the air quality sensor detail, showing the current PM2.5 value over time, and showing the current calculated air quality index value, and the PM1.0, PM2.5 and PM10 sensor values.

While the solution linked above works well, I wanted a solution that could work with multiple sensors and show up as a native air quality sensor in Home Assistant. After getting started with the base, I was able to accomplish all of my initial goals and managed to even release it to the public as well. It may or may not work with HACS, as I don't use it. You can find the repository on GitLab. It's released under the MIT license so feel free to do whatever with it.

The new integration only supports setup via the GUI, and by copying a sensor JSON url during setup. It's basic as heck, but it gets the job done. Once initialized, you will have an air quality sensor, providing the PM1.0, PM2.5, and PM10 data, plus a calculated US EPA Air Quality Index (AQI) value for PM2.5. Note that while Home Assistant actually supports PM0.1 data, PurpleAir only goes to 0.3, and only gives you a raw count at that, rather than calculating the µg/m³ value. I didn't feel comfortable attempting to calculate that with the data at hand and having people rely on it. Additionally, as well as giving you an air quality sensor, a generic sensor is also provided, surfacing the calculated AQI data itself, allowing for ease of use with any automations or dropping it on your dashboard.

Installation & Setup

Installation is as straightforward as it can be, simply download the source, and extract the purpleair directory in your <config>/custom_components directory (where <config> is the directory that contains your configuration.yaml file. Restart Home Assistant to get it to pick it up, and add the integration via the GUI.

Screenshot of adding a new PurpleAir sensor.

Adding the sensor couldn't be easier (well, it could be, but this was a one-day project)!

  1. Navigate to the PurpleAir Map.

  2. Find the nearest sensor to your location. It could be down the street or a couple counties over. It all depends on where you live!

  3. Click on the sensor, and click on the "Get This Widget" and copy the "JSON" link (this is the annoying part).

  4. Paste the URL in the integration dialog and submit. You should be golden!

Notes

There are a couple things to note though!

  • This was a one-day project, so it only supported what I needed to accomplish at the time.

  • It does not support accessing the local sensor data directly on your network. I don't have a device here to test with. To support batching, the API URL it uses is hard-coded.

  • It batches the API calls in an attempt to be nice to the free API service provided. It polls every 5 minutes and batches all configured sensors together. (PurpleAir updates their data every 2 minutes) This means that if you add a second station, it can take up to 5 minutes before the station starts showing data.

  • It averages out the data on stations that have two sensors. There was an attempt at determining a "confidence" score associated with it and trying to surface that somehow. I couldn't find any supporting documentation on how PurpleAir does it for their map, so it's left undone at this point. This does mean that if you have a sensor that's wildly out of whack, your AQI will reflect it accordingly. If it becomes an issue, I'll look at addressing it. You can see the confidence of the station by looking at the station card and looking for the small ✓100% label (I've only ever seen 100%).

  • There is NO ERROR HANDLING in this. Like, at all. If the network goes down or the API changes, it'll fail with error messages in your log file. If you want some insight on what it's doing, you can add the following snippet to your configuration.yaml file to get debug logging enabled for the component:

    logger:
      default: info
      logs:
        custom_components.purpleair: debug
    

Fancy-factor Dashboard Cards

To up the fancy-factor in displaying the AQI data, I ended up using the mini-graph-card and a little Lovelace configuration. It's amazing how far Home Assistant has come to be able to add this level of customization while keeping it relatively easy to use and extend.

Screenshot of the PurpleAir integration with the mini-graph-card graph and the current air quality index and micrograms per cubic meter displayed.

It's nothing much, it's a vertical stack with the mini graph card, and an entity list beneath it. To increase the visual information, the graph lines use the color threshold option to match the standard AQI color scheme. If you want a similar setup, here's the YAML for the whole setup. Simply copy out the mini-graph-card part if that's all you're interested in.

type: vertical-stack
cards:
  - type: 'custom:mini-graph-card'
    entities:
      - sensor.broadlake_view_air_quality_index
    line_width: 5
    points_per_hour: 4
    hours_to_show: 6
    show:
      legend: false
      labels: false
    color_thresholds:
      - value: 0
        color: '#68e143'
      - value: 50
        color: '#ffff55'
      - value: 100
        color: '#ef8533'
      - value: 150
        color: '#ea3324'
      - value: 200
        color: '#8c1a4b'
      - value: 300
        color: '#731425'
  - type: entities
    entities:
      - entity: air_quality.broadlake_view

Please let me know if you use it or if you have any problems. You can reach me on the Home Assistant forums or open an issue in the repository.

Automatically start a Parallels Virtual Machine at boot on Mac OS X 10.8

Setting up my new Mac OS X server, I have a need to set up a virtual Windows Server to host some of my ASP.net websites under IIS. Knowing that there are several virtualization options available for OS X, including VMware Fusion, Oracle VM VirtualBox, and Parallels Desktop, I decided to go with Parallels as I am already used to its interface and how it works (since I use it on my MacBook to virtualize Windows 8) and I happened to have an available license for it. While the instructions below are explicit for Parallels Desktop 8, I imagine the other solutions should work in a similar fashion, especially VirtualBox since I know it has a command line interface and can easily run in headless mode.

Installing Windows Server 2012 was pretty straightforward and uneventful, the only option I can think of that might have an impact is I selected the "Share this virtual machine with others" option when creating the virtual machine. Selecting this option caused the virtual machine to be stored at /Users/Shared/Parallels instead of being placed in the signed in users home directory. This should definitely be selected if you plan on running the virtual machine under a service account rather than the owner account.

Since we're wanting to run this on machine boot without using auto login and the user's login items (as suggested in many places online) we're going to need another launchd property list file to instruct launchd to start our virtual machine for us.

<?xml version="1.0" encoding="UTF-8"?>
<!DOCTYPE plist PUBLIC "-//Apple//DTD PLIST 1.0//EN" "http://www.apple.com/DTDs/PropertyList-1.0.dtd">
<plist version="1.0">
<dict>
  <key>Label</key>
  <string>com.gibixonline.miu</string>
  <key>UserName</key>
  <string>miu-owner</string>
  <key>ProgramArguments</key>
  <array>
    <string>/usr/bin/prlctl</string>
    <string>start</string>
    <string>{ffae2c75-8f39-4ac5-9585-868bdfa91014}</string>
  </array>
  <key>KeepAlive</key>
  <dict>
    <key>SuccessfulExit</key>
    <false />
  </dict>
  <key>RunAtLoad</key>
  <true />
  <key>LaunchOnlyOnce</key>
  <true />
  <key>AbandonProcessGroup</key>
  <true />
</dict>
</plist>

The above file is saved using the reverse DNS style in the /Library/LaunchDaemons folder (since this is a non-interactive system process added by us) and the label matches the file name. In case I have other virtual machines in the future, I decided to use the virtual machine's name (Miu) as part of the file name (com.gibixonline.miu.plist) and label (com.gibixonline.miu). There are a couple significant items I would like to point out this particular property list file.

  • We're making use of the UserName key to launch the VM as the owner (the user which created the VM). I intend on making a service account like I did for Nginx, but I haven't done so yet. I don't think there will be any problems since I marked the VM as "Shared." Of course, if your VM lives in a home directory, the user will need to be able to write there to boot.

  • We switched from using the Program key to ProgramArguments. The last item in the array is the machine's unique identifier. You can use either the unique id or the name of the machine, I chose to use the unique identifier in case I ever changed the name of the machine. You can get the unique id by running prlctl list -a

  • LaunchOnlyOnce is added, since there is no way for launchd to know the status of the VM. This indicates that the property list should be loaded and executed once and discarded. You won't find the status of this job in the list.

  • Most importantly, AbandonProcessGroup is set. Without it, when prlctl exits, launchd will automatically terminate any process with a parent process id that matched prlctl. This meant the machine wouldn't boot for more than a second or two.

After creating the plist file, don't forget to register it with launchd by running sudo launchctl load /Library/LaunchDaemons/com.gibixonline.miu.plist. I've had no issues with the machine booting when the host boots and I haven't run in to any stability problems with the VM.

One important thing I would like to point out. When launching in headless mode like this you should avoid opening the Parallels Desktop app in your login session. In doing so, the VM will show its screen (which is nice) but you won't be able to close Parallels Desktop or log out of your Mac without suspending or stopping the virtual machine. If you accidentally do this (or had to because it disappeared from the network) simply make sure Parallels Desktop has quit and either ssh or open a terminal and type in the start command (no need for sudo, su maybe, if you're running as another user): prlctl start Miu will bring the VM right back up.

In fact, to avoid this, I installed a remote desktop client and will connect through there if I need a "console." Since the official Microsoft Remote Desktop client for Mac crashes so much and has issues with accessing a tunneled RDP session, I recommend using the free CoRD remote desktop software.

Imported Comments

Adam on Monday, August 19, 2013 at 10:38 PM wrote:

Thanks for taking the time to write this up! Its exactly what I was looking for. I think the only think missing was I had to chown on the file to root in order for "sudo launchctl load <filename>" to work.

Automatically start Nginx as a daemon on Mac OS X Mountain Lion 10.8

As I'm setting up my new Mac Mini server running Mac OS X 10.8 Mountain Lion, I wanted to utilize my favorite web server, Nginx. Of course, I wanted to take full advantage of Nginx's multi-process architecture and privilege separation while running as a system daemon running and managed by launchd. This post assumes you've somehow managed to successfully install Nginx. Personally, I went the homebrew route and installed Nginx through the forumla, so all the paths will point to those locations. Naturally, adjust for your own installation.

You'll first need to create the user and group the Nginx daemon will run under. Unless otherwise noted, run the commands in your terminal as your user (yes, I use sudo constantly rather than get a root shell)

# I used a user/group id of 390. I hope it won't conflict
% sudo dscl . create /Groups/nginx PrimaryGroupID 390
% sudo dscl . create /Users/nginx UniqueID 390
% sudo dscl . create /Users/nginx PrimaryGroupID 390
% sudo dscl . create /Users/nginx UserShell /bin/false
% sudo dscl . create /Users/nginx RealName nginx
% sudo dscl . create /Users/nginx NFSHomeDirectory \
  /usr/local/var/run/nginx
% sudo dscl . create /Groups/nginx GroupMembership nginx

I then edited the Nginx configuration file at /usr/local/etc/nginx/nginx.conf to change the user and group to nginx and set the number of worker processes from 1 to 4.

user nginx nginx;
worker_processes 4;

Because the worker processes will be running as a non-root user, we need to update the log locations so the new user can write to them. I gave the nginx user ownership over the main Nginx log directory and associated log file.

# Give nginx ownership of its log files.
% sudo chown -R nginx /usr/local/Cellar/nginx/1.4.0/logs
% sudo chown nginx /usr/local/var/log/nginx

# The next is optional, based on your plist choices.
# Will be used to store the stdout and stderr files.
% sudo install -o nginx -g admin -m 0755 -d /usr/local/var/log/nginx-std

Now that we've got our new user and group created, the configuration file updated, and our permissions set, we can now create our property list file to feed to launchd so the system knows how to handle our process. Since this is an administratively installed background system daemon we'll be storing the file in /Library/LaunchDaemons. Note, we're not storing it in /System/Library/LaunchDaemons as those are strictly for Apple's use, and we don't want to mess around in there.

Following the proper reverse DNS notation, I've named my custom Nginx plist file com.gibixonline.nginx.plist. You can name yours whatever you want, obviously, but I aim for readability and being able to easily identify files as I add more.

<?xml version="1.0" encoding="UTF-8"?>
<!DOCTYPE plist PUBLIC "-//Apple//DTD PLIST 1.0//EN" "http://www.apple.com/DTDs/PropertyList-1.0.dtd">
<plist version="1.0">
<dict>
  <key>Label</key>
  <string>com.gibixonline.nginx</string>
  <key>Program</key>
  <string>/usr/local/bin/nginx</string>
  <key>KeepAlive</key>
  <dict>
    <key>SuccessfulExit</key>
    <false />
  </dict>
  <key>RunAtLoad</key>
  <true />
  <key>WorkingDirectory</key>
  <string>/usr/local</string>
  <key>StandardOutPath</key>
  <string>/usr/local/var/log/nginx-std/stdout</string>
  <key>StandardErrorPath</key>
  <string>/usr/local/var/log/nginx-std/stderr</string>
</dict>
</plist>

If you chose not to create the nginx-std log directory, remove the StandardOutputPath and StandardErrorPath keys and strings from the XML file (the last four lines in the file before the </dict> tag). Now, with your property list file saved, we're ready to register it with launchd, which we manage by using the launchctl program. To register, you'll use the load command and give it the full path to your property list file and that's it!

% launchctl load /Library/LaunchDaemons/com.gibixonline.nginx.plist

If no output is generated, the command should have completed successfully, which you can verify by using the list command.

% sudo launchctl list com.gibixonline.nginx
{
    "Label" = "com.gibixonline.nginx";
    "LimitLoadToSessionType" = "System";
    "OnDemand" = true;
    "LastExitStatus" = 0;
    "TimeOut" = 30;
    "Program" = "/usr/local/bin/nginx";
    "StandardOutPath" = "/usr/local/var/log/nginx-std/stdout";
    "StandardErrorPath" = "/usr/local/var/log/nginx-std/stderr";
};

Now, on my own machine, Nginx did not start right away, in fact, it didn't start at all (even with the start command) but it did start automatically on reboot, which is what I really wanted. If I added <debug><true /> to my property list file, it started every time it was added, but I'm not entirely sure what debug does (it says it increases logging) so I don't want it in there.

If you need to make changes to your property list file, or what to remove it, you need to unregister it first!

% sudo launchctl unload /Library/LaunchDaemons/com.gibixonline.nginx.plist

# If you're uninstalling it, your'e done, just remove the plist file. If you're editing
# it's the same as before:
% sudo vim /Library/LaunchDaemons/com.gibixonline.nginx.plist
% sudo launchctl load /Library/LaunchDaemons/com.gibixonline.nginx.plist

Well, that's about it! I found that there wasn't a recent posting of setting up Nginx on OS X that had all the information in one place, so I hope this helps anyone else wanting to do the same as I did! My next entry will be about getting Nginx to run on port 80 (which it can, using the method above, since the master process runs as root) and getting it through the firewall without completely disabling it.

wlalias.com is live!

The wlalias tool now has an official site at http://wlalias.com. All major information will be posted there with better documentation and information. I'll add a feed of some sort relatively soon so that people can follow that for proper updates to the application.

As always, if there is any issues to report, please use the BitBucket Issue tracker for wlalias.

wlalias 1.5 released - Create email aliases for Domains for Windows Live

An update to the wlalias tool has been released. This release is mostly a bug fix release. The most significant change is that SoapExceptions now attempt to retrieve the internal error information provide the information to the user.

A couple of questions by users have come up, so without further ado, a mini FAQ:

  • How many aliases can I add to a user?

    The actual Windows Live documentation says 15 aliases can be added (see the remarks section) but end users have reported that they can only add 5 aliases to one user using this tool. I am still looking in to the issue.

  • I've received a SoapExecption. What do I do?

    If you're using version 1.0 of the tool, upgrade now to 1.5 and try again. There are many, many reasons why the SoapException can occur, but the most common reason mentioned occurs when attempting to add an alias using an email address that is already in use by an actual Windows Live account. Until I see what the actual error description is, I can't really know though.

  • What's next for the tool?

    I have plans to add support to evict and import members. Evicting members will allow you to kick out existing accounts that may have been registered using your domain before it was added to Windows Live for Domains. Importing members will allow you to import an unmanaged user in to your domain if it was registered in your domain. These two methods should help provide solutions for the question above.

If you haven't already, go download release 1.5 now and see if it helps. If you haven't used it, but want to add aliases to your Windows Live domain, give it a run, it should work. No new features have been added, so see the initial post on wlalias 1.0 on a tutorial of the program.

Imported Comments

Paolo Rodríguez on Monday, December 24, 2012 at 9:52 PM wrote:

You are fantastic, thank you very much for this tool.

Nicolas Lagalaye on Thursday, February 7, 2013 at 8:23 AM wrote:

The tool is great, thanks for sharing it. So good it is a command line one: clear and straightforward. As for 2.0 version, will it be able to import unmanaged accounts or only evict? I'm so looking forward to it!

Talidorn on Monday, February 25, 2013 at 11:51 PM wrote:

The reason that the users of your script can only add 5 alias addresses is that you are limited to 15 max... 5/year. So, add 5... add a reminder to add another 5 on your calendar for next year and then add them... then add a reminder to add another 5 on the 3rd year (2 years from first alias addition) to add the remaining 5.

tada! 3*5=15.... and you are all maxed out.

Stuart on Friday, April 5, 2013 at 9:03 AM wrote:

I've just tried using your tool for the first time to add an alias to an account and am getting the SoapException error:

"Creating alias...The call failed with outcome:
SoapException Error 3001: Invalid member name."

The email address that I'm trying to add an alias for also has a Windows Live account with the same name - does this mean I can't add aliases to this email?

Stuart on Friday, April 5, 2013 at 10:22 AM wrote:

Found my issue - I wasn't using the full email address for the alias. Working great now. Thanks for the tool!

wlalias 1.0 released - Create email aliases for Domains for Windows Live

Well, in less than 72 hours after having David convince me to write the tool, I've already published version 1.0 of wlalias. Actually, it was closer to 48 hours, but who's counting? Really though, it isn't all that impressive. I had most of the core code already written all I had to do was add command line parameters, fluff, error checking, fluff, and licensing. In case you're wondering, I personally call it wail-lias even though that's not how it's written. If you're not interested in the rest of this text and want to download it, the compiled binary is available in the project's download section.

Speaking of licensing, my previous post about that was a bit off. I decided to keep using the Microsoft Public License (Ms-PL) as my license and keeping within my other projects. As usual, the license comes with no warranty or guarantees and pretty much lets you do what you want with it, including selling it. I'll admit, I'd be very sad if someone did that, but it's not like I could stop them anyway.

All right, getting down to it, the tool is very basic and can handle herself in the basic situations in which she was designed to run. The output and printed help are both very basic and things in which I plan on improving in the future. I promise (not legally binding though!) that there are no bugs or viruses and that no communication is sent back to me or any of that stuff (take a look for yourself if you want). The three basic situations that the tool is designed for are:

  1. Listing known aliases for a member.

  2. Adding a new alias for a member (up to 15, Microsoft's rule).

  3. Removing an alias for a member.

Administrative Credentials

This isn't explained very well in the program itself, but you'll need to provide some admin credentials to use the remote service. By administrative credentials I mean that you'll need to use an account that not only manages the domain the user's account logs in with but it will also need to manage the domain of the alias. If the alias you're adding or removing exists in the same domain as the user's login domain, you'll generally be fine. If you're adding or removing a domain that is not related to the login domain, you'll need to make sure your admin account can manage both (i.e. both domains are listed when you log in to domains.live.com).

Listing known alaises

Ok, this one is pretty straight forward, you'll run wlalias list email@address to show the currently assigned aliases for the user. The documentation states that the parameter is the "fully qualified member's name" which I've found to be their login email address. If the user is found and is a part of your managed domains the aliases will be printed.

C:\wlalias\bin>wlalias list test_user@gibixonline.com

Please provide administrative credentials for the domain to manage.
Username: come-on.really?@gibixonline.com
Password:

Known aliases for test_user@gibixonline.com
    test_user3@gibixonline.com
    test_user5@gibixonline.com

Adding a new alias

Creating an alias is just as straightforward as the rest of the application. In this case you'll run wlalias add login@email newalias@email and provide the admin credentials as usual. Just as a note, both the login email and the new alias must be "fully qualified" as described above. Sadly the application has to do a little guess work here since Microsoft is lying. When calling the CreateAlias method the documentation says:

Return Value

An XML block that contains a list of alternative names. The following is an example of the XML block. [...]

Well, as much as I'd love to believe that, I've never, ever received an XML block of alternative names. All I get back s a hash of some sort that doesn't correlate with anything that I know of. I've followed all of their directions as best I could and can't seem to find where the problem might be. I suppose I can use Fiddler and see if it's actually returning the wrong data or if it's the implementation, but that's for another day. Instead, the application will then call to list the aliases a second after creation and see if the alias is in the list and let you know accordingly.

C:\wlalias\bin>wlalias add test_user@gibixonline.com test_user6@gibixonline.com

Adding alias test_user6@gibixonline.com to account test_user@gibixonline.com.
If this is incorrect, press ^C or press escape in the password entry.

Please provide administrative credentials for the domain to manage.
Username: teehee.heehee@gibixonline.com
Password:

Creating alias...done.

The server returned: 0003CEEB822590A9

According to the docs the server should've returned the alias
as the result. Since it didn't, I'm checking the alias list of
the user name to see if it's listed.

The alias was found.

Removing an alias

After the previous two sections, this one will be the shortest. It's very close to the previous command except that you give it the address to remove, wlalias remove login@address alias@address. It takes two parameters: the fully qualified login name and the alias to remove. There is no return value from this call so all I have to go on is the fact that the server didn't return an error when being called.

C:\wlalias\bin>wlalias remove test_user@gibixonline.com test_user5@gibixonline.com

Removing alias test_user5@gibixonline.com from account test_user@gibixonline.com
.
If this is incorrect, press ^C or press escape in the password entry.
Please provide administrative credentials for the domain to manage.
Username: maybe?.nahnope@gibixonline.com
Password:
C:\wlalias\bin>

That's it, there's no output. Well, it'll mention something if it failed via HTTP. I suppose it could've checked like it did during creation but I didn't add it this time.

Future

While the tool is functionally complete, I do plan on making a few modifications in the future. As I was testing, I got tired of typing in the password and realized that this tool cannot be easily automated at this time. I was thinking of allowing you to store the username and password in envrionment variables and using those if they exist. Honestly, I just didn't want to deal with handling a password coming in via the command line. Also, with my current method, your password is secured and only exists in a readable format for less than a second (during the Authentcation() call). If I allow automation, that means your password will exist as a full string in memory that I won't be able to clear when I'm done. My other thought is to clean up the output and make it a bit easier to read. I was also thinking of expanding this to allow some other management of Windows Live, but we'll see.

If you made it this far, I congratulate you. You must have missed the download link I put in the first paragraph. The official download source of the application will always be on the project's repository, so be sure to download it from there.

If you have any issues, please feel free to create a new issue on wlalias' issue tracker. If I remember right, you won't need to sign up to create one. If you want, you can also contact me through my blog and I'll try to respond.

I can only hope that you find this tool useful. Once again, download wlalias 1.0 and create aliases with (relative) ease!

Imported Comments

Marius on Monday, September 24, 2012 at 10:02 AM wrote:

Worked like a charm. Thanks

Tony Gray on Tuesday, October 30, 2012 at 9:52 AM wrote:

This is fantastic. Thanks!

Pim van de Vis on Thursday, November 1, 2012 at 4:05 AM wrote:

Briljant! You're a real lifesaver. I created separate mailboxes for my aliassen and created forwarding rules, but that's not perfect.

When I tried to create the aliasses I got an error, because the adressen already existed. When I deleted the forwarded-mailboxes, I could instantly create new aliasses using the same name.

I'm happy, and thanx for the great tool.

Funny thing is: Microsoft doesn't expose the alias-feature in their interface, but it is a supported feature, because I received confirmation mails that I succesfully created some alliasses. And I can now choose which alias to use when sending new email, just my clicking on a dropdown box.

Joseph on Monday, November 5, 2012 at 5:27 AM wrote:

Great - worked brilliantly. But now it is showing me a Passport error?

Jim on Wednesday, November 7, 2012 at 12:20 AM wrote:

Thanks for the great tool! Was gonna write one myself but found your tool. Now the last obstacle of moving from Google Apps to Windows Live is removed.

Steven on Friday, November 16, 2012 at 10:29 AM wrote:

Fantastic!! Thanks for the coding effort Josh. It would have taken me a lot longer to figure this out.

Manuel on Tuesday, December 4, 2012 at 9:18 AM wrote:

Thanks for sharing this tool, it's working perfectly! (and saves me from a big headache) Greetings, Manuel

Phil on Monday, December 10, 2012 at 11:01 AM wrote:

Can this tool be used to direct an alias to any email address? For instance if I own domain.com and I want to create the alias test@domain.com that goes to the email address test@hotmail.com (on a domain I don't own) is it possible? I know other email applications allow you to setup an alias using any domain you own to go to any email address.

The reason I ask is our is looking at using domains.live.com to manage our clients email. Our clients will often have us setup an alias like info@domains.com, but want it to go to their personal address like example@aol.com. Google Aps allows you to direct the alias to any email address, even if it's not on the same domain. This tool doesn't appear to do that.

Joshua on Friday, December 14, 2012 at 11:56 AM wrote:

Phil, to my knowledge you can set an alias for any domain name managed by the same domain administrator account under https://domains.live.com. So if you add both example.com and example.org and have an admin account with permissions to both, you can create an alias for you@example.com and you@example.org. (The domain names can be anything obviously, I just chose example for safety).

As for redirecting mail, no, the alias must be attached to an existing account under your control. You could, however, create an account with that name and set up mail forwarding. I'm not sure if inactive expiration rules apply to managed accounts though.

Joshua on Monday, December 24, 2012 at 11:15 PM wrote:

For those of you following from home, an update has been released to provide more helpful error information. wlalias 1.5 released - Create email aliases for Domains for Windows Live

Sid on Thursday, January 10, 2013 at 10:10 PM wrote:

Thanks Josh!! Very cool. I must admit I was a bit nervous punching in the admin credentials into a tool just downloaded "off the internet". I opened the source in VS2012 and stepped though the entire core (even compared against the class created by the SOAP service' WSDL!). Didn't notice anything hanky-panky :). You even used the SecureString class! BTW, if you store the credentials into isolated storage, why do I need to type them everytime (Windows 8)? I built the binary myself in VS2012 (unsigned though, key isn't in hg)

Joshua on Monday, January 14, 2013 at 11:38 AM wrote:

Sid,

The credential storage should work without much issue once you run the "store" command. Since you're running an unsigned version, the isolated storage space chosen by .Net will vary based on the location you're running the executable. Try copying the resulting binary to a new location, run the store command, then try running one of the other commands and it should work.

You should be able to verify the credentials are stored by looking in your isolated storage directory at %localappdata%\IsolatedStorage. The directory path it'll live under is random (based off the strong name if available, or the executing path otherwise). Dig deep until you find the "AssemFiles" directory and you should see "key" and "credentials", the contents of which are encrypted of course.

I also use VS2012 and run on Windows 8, so let me know if you aren't able to get stored credentials working for you! Joshua

DB on Saturday, July 13, 2013 at 5:06 PM wrote:

Thank you. It just works, and that's what's good about it.

Creating email aliases for Domains for Windows Live

So I recently switched from using Google Apps for your domain to the Domains for Windows Live (starting to think I have that named wrong). As part of the move I needed to be able to create aliases for my account ro receive all of my email proper. Ater a ton of searching I stumbled on a post that mentioned that while you can't create aliases through the web interface you can create aliases if you use their web application programming interface. Continuing my search I eventually found the API documentation and quickly whipped up a program that could communicate with the API to accomplish my goal and create aliases.

Fast forward about three weeks later and my best friend is needing to create aliases too, and quite a bit of them too from what I hear. Now, I originally wrote my tool for my use only (and one time use at that too) but I tried to modify it so my friend could use it without needing Visual Studio or any other programming tools. While it did launch, it didn't seem to work (which makes no sense) but after a bit of talking, and hearing his frustration on how hard this is, he convinced me to create a full blown utility program to help everyone manage aliases with Windows Live.

So, without further ado, I present to you the first alpha version of wlalias. Wlalias is a .Net Framework 4 application written in C#. It is completely open source and public domain, and is tentatively licensed under the MS-PL license. Basically, you're free to download it and make changes, but you cannot use it in any commercial project that makes money. This tool is something I am doing in my own time and I do not provide any warranty or guarantee that my tool will work. Hell, for all I know it could manage to blow up your computer - but, it wouldn't be my fault.

Currently only the listing of aliases has been done (it is the only non-committal operation out there I'm working with) and it can be downloaded right now for testing. For your viewing pleasure, I've included a censored screenshot of it listing my current aliases. Yes, for whatever reason, Windows Live lists my phone number as an alias.

Enjoy!

Screenshot of the wlalias tool creating an email alias.

Imported Comments

Garry on Thursday, November 1, 2012 at 7:10 PM wrote:

I've been waiting for ages for something like this. Worked great, thanks!!!

Anonymous on Friday, December 14, 2012 at 4:22 PM wrote:

It was working fine for a day or so. Now it just gives me errors, even though all information is correct. Seems MS changed something to prevent us from adding aliases?

Errors I get now:
Creating alias...The call failed with outcome: SoapException
An exception occurred too! (sorry): PassportError: Passport error.

Aero on Friday, December 21, 2012 at 3:11 PM wrote:

Awesome tool.

Where can we find the API documentation - trying to figure out what else we could do with our Domains for Windows Live accounts ...

Joshua on Sunday, December 23, 2012 at 8:20 PM wrote:

Anonymous: I'm working on an update to the tool to be a bit more descriptive in the error messages. The most common error has been trying to create a new alias for an address that's already in use by an actual account.

Aero: The documentation is available on MSDN under the Windows Live Admin Center SDK Reference at http://msdn.microsoft.com/en-us/library/bb259710.aspx.

Aero on Tuesday, December 25, 2012 at 12:21 PM wrote:

Thanks Joshua!

Tom on Friday, January 13, 2013 at 11:34 AM wrote:

Thank you for a great utility. I never understand why Microsoft don't publish these possibilities clearly. I was impressed that I have two domains and can alias between the two.

I have wanted the alias feature for years, thank you again.

Jeff on Thursday, February 21, 2013 at 5:27 AM wrote:

Great tool!!
Do you have anything to add a domain alias also? So anything sent to mail@example2.com would be redirected to mail@exemple.com.

thanks a lot!

Steven on Wednesday, March 20, 2013 at 10:04 PM wrote:

@Jeff

I have an account with 2 domains in it, and I was able to add x@x2.com as an alias on the x@x1.com account fine. I think you just have to have registered both domains.

Steven on Wednesday, March 20, 2013 at 10:09 PM wrote:

I'm getting "not authorized for this operation" on my own domain, but when I do it for an account I set up for business it works fine. Any thoughts?

Martin on Wednesday, June 26, 2013 at 11:57 AM wrote:

I have this problem:
Creating alias...The call failed with outcome:
Error 1004: Not authorized for this operation.

What happened?

Joshua on Wednesday, June 26, 2013 at 10:49 PM wrote:

There are a couple things that could be going on. First, I recommend you check out the application's site at http://wlalias.com and see if any information there helps you with your problem.

Off the top of my head some things you can check are:

  • Make sure you've validated your Microsoft Account (meaning it has a phone number for backup and such). - Make sure the user you're signing in with can administer the domain (meaning it can log in to https://domains.live.com)

  • If you have two factor authentication, you'll probably need to create an application specific password.

Good luck and let me know if you're able to get it fixed!

Keith on Thursday, August 1, 2013 at 9:08 PM wrote:

When I try to load to application it immediately closes. Any ideas? I have .net framework installed.

Joshua on Thursday, August 1, 2013 at 10:01 PM wrote:

Keith, the application is a command line program, meaning you'll need to open the command prompt to use it. There's a quick getting started section on the wlalias homepage at https://wlalias.com and the full documentation is at https://wlalias.com/help/.

Hope that helps!